Showing posts with label recipes. Show all posts

Foraging My Garden


Last Friday, I looked in the fridge before I left for work. Besides some cream and lunchmeat, there wasn't much there. Crap. I really didn't feel like braving the grocery store at 5 p.m. on a Friday after a long day of work. And then I remembered - Hey! I have a veggie garden! There's not much in it (yet), but there's definitely enough for a fresh spring meal.

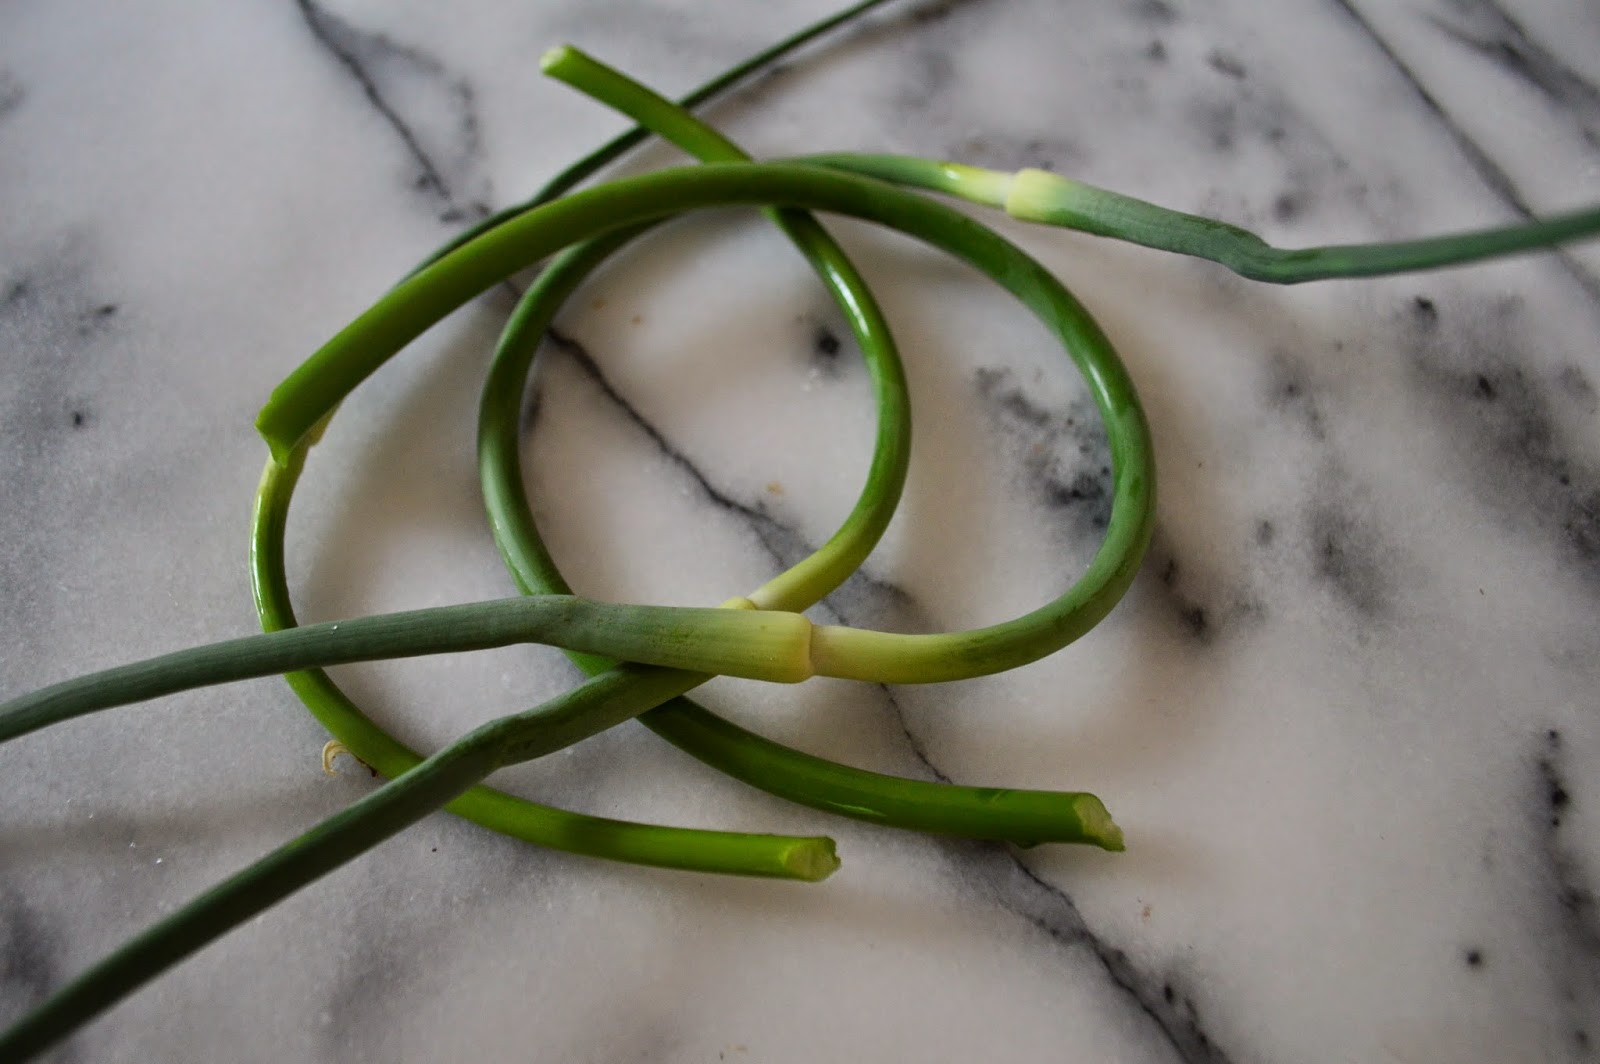
When I got home from work, I set about selecting the ingredients from the garden. There were garlic scapes...


Baby arugula...


Broccolini...


Radishes...


And fresh herbs. I even managed to find a cooked chicken breast in the back of the fridge that was still good.

I chopped up an onion (one thing I did have in my fridge), and sauteed it with a little bit of jalepeno that was in my freezer from last year's garden. Then in went the scapes for a few minutes.

I cooked up some pasta, and toasted the broccolini (kinda like kale chips). Once the pasta was finished, I drained it, then threw in the arugula to soften and mixed in the onions and scapes. A dash of cream, a pinch of salt, topped with the toasted broccolini and fresh basil, and I went from having "nothing to eat" to having a feast for two!


Leftover Success

Mike and I went to Pasta Jay's on our way back from Grand Junction, and we each got a gluten-free dish. (Here's my review.)

Anyways, the serving sizes are big enough for us to split, so we had some leftover. Mike's leftover pasta lunch became my dinner - with the addition of some frozen peas and grated Parmesan cheese on top.


Success!

Pan-Fried Cod Stuffed with Feta and Spinach over a bed of Asparagus and Rice

Happy Spring! I can't tell you how happy I am that it's finally arrived. In honor of the season, here's a spring green meal.


I don't really have a recipe for this one. It's steamed rice, plunked on a plate. Asparagus, cooked on a grill pan and slathered with butter. Cod, sliced down the middle and stuffed with carmelized onions, spinach, and goat cheese, then salted and peppered and pan-fried. Topped with pesto (which it could have done without), and bacon bits, which were absolutely essential.

Have I mentioned I've been on an asparagus kick lately?

$20 Restaurant-Style Caesar Salad ... for about $5

Does it drive you crazy how much restaurant food is marked up? Not me, usually. I'm paying for somebody else to be doin' the cooking, and more importantly, the dishes. But when it comes to salad...I usually just don't see the point.

I made the mistake once. Mike and I ordered a Caesar Salad that cost about $12-$15. We were going to split it. When it came out, there were three pieces of lettuce smeared with dressing. I relished every last bite (and it was good), but ever since then, we've joked about expensive salads in fancy restaurants.


The thing is, salads are easy. Even when you've made the dressing from scratch. And the cleanup is pretty simple, too. So go out to eat. Pay top dollar for somebody else to shuck your oysters, and do the cleanup, but skip the salad. It's overpriced, and you can do a better job at home!


Caesar Salad


Don't let the multiple parts of this recipe daunt you. If you already have crutons, you can use those, or leave them off entirely. If you have pre-shredded parmesan cheese, you can use that. Just try the dressing. Just once. The whole recipe, including the homemade crutons, takes about 20 minutes from start to finish. 

Dressing

  • 1 clove garlic, minced
  • 1 tablespoon anchovy paste
  • 1 tablespoon champagne vinegar
  • Juice of half a lemon
  • 3 tablespoons mayonnaise
  • 1/4 cup olive oil
  • 1/2 teaspoon ground mustard
  • Pinch ancho chile powder (Optional - you could also use just a dash of cayenne)
  • Pinch salt and freshly ground pepper


Use a blender or an immersion blender to combine all ingredients until they come together in a thick dressing. Taste, and adjust seasonings if desired.

Makes enough dressing for about 4 salads.


Crutons

  • Crusty bread, torn into 1-inch pieces (I used this bread)
  • 2 tablespoons butter
  • 1/2 teaspoon paprika


Heat the butter in a skillet. When it is just beginning to brown, toss in the paprika, then the bread. Saute, stirring gently, until the bread just begins to brown. Remove from pan and set aside to cool.

Salad

  • Dressing
  • Crutons
  • Romaine Lettuce
  • Parmesan Cheese


Tear and wash the lettuce. Drain and pat dry, or use a salad spinner to remove excess water. Toss with the dressing. Shave the parmesan cheese onto the salad using a vegetable peeler (you can also use a cheese grater for smaller shavings). Top with crutons. Enjoy!


Weekend Links

I spent this weekend getting over a cold ... it seems to be on its way out, thankfully. Luckily, there were plenty of Olympic games to watch. I'm a sucker for figure skating...

Knitting

Knitting at the Olympics! Apparently it's a group knitting project that the Finnish Olympic team is working on. Awesome! Also, I'm reading Adventures in Yarn Farming.  Two words: Lambie Jammies. It's total cute overload. 

DIY

My studio is undergoing some much-needed cleanup. If only it could be as clean (and multifunctional) as this one. 

Garden

While the rest of the country keeps getting blasted with snowpocalypse 2014, here in Salt Lake City we've been getting rain. Odd, to say the least. On the bright side, the snow has melted around my herbs, and I'm hoping most of them will come back in the spring.  I'm seriously considering growing more lavender this season, and looking to this for tips.

Cooking

Apparently, February is National Grapefruit month. What with this cold knocking me off my feet, I've been downing grapefruit like nobody's business. I especially like broiled, with cinnamon and honey. But vanilla would be tasty too...
What caught your eye over the weekend?

Getting Better all the Ti-i-i-ime

About a month ago, I made spinach-leaf sushi, and enjoyed it immensely. But wilting the leaves was tedious. I was doing it one at a time, because when you cook it all at once, it globs together, and isn't so great as a substitute for nori.

Well as I was getting ready to make it a second time, I realized I could do it all at once in the microwave.

Line a plate with plastic wrap, and spray with a nonstick spray. Lay the spinach so that each leaf overlaps by about half with the leaves around it.


Microwave until the spinach just begins to wilt, about 30-40 seconds. If any holes open up, simply cover with another spinach leaf, then microwave another 10 seconds.


From here, it's just like any other sushi...fill with rice...


Add your filling...


Roll, slice, and serve!


Apple Crisp


Is everyone done with their New Year's resolutions yet? Believe it or not, I'm still sticking to mine. Luckily, they don't involve avoiding sugar. (Maybe that's why they're easier to keep this year...)

Anyways, I had some apples rotting in the fridge. It was gross. They weren't really rotting, but they were past their prime for eating, and covered in bruises. Which was why I didn't eat them in the first place, I guess.

So, I sliced them up, covered them in cinnamon sugar, and topped with a cinnamon-sugar crumble made of gluten-free flour mix, sugar, cinnamon, and butter. I was going to sprinkle some vanilla over the apples, but I forgot. The whole thing went into the oven for about an hour at 350.

Topped with coconut cream ice cream (half coconut milk, half whipping cream, with some sugar and vanilla), the apple crisp was perfect for breakfast, lunch, and dinner.

No real recipe for this one, since I mostly just threw things together willy-nilly, and there are plenty of recipes for both of these things all over the interwebs.  But if you've got some fruits languishing in your fridge, I hope this will inspire you to save them from the compost heap and enjoy them fully!

Weekend Links

I'm overwhelmed by the positive response to Ice Glider ... my very first published knitting pattern. It just confirms that I want to be designing more!

This weekend I did a little bit of everything...cooking, catching up on housework, knitting, working on some other projects, reading, and sleeping. I slept 12 whole hours Saturday night, which means that I must have really needed it. I hope everyone is enjoying their long weekend. Here are some links that caught my eye this weekend:

Knitting

I'm in love with this pattern. It's not a garment I would normally buy, but I have a good feeling about this one...

DIY

We don't have glass recycling here, which is a shame. I have plant nannies, which put quite a few old wine bottles to use, but I'm itching to try some more DIYs with wine bottles. The biggest hitch is getting the labels off. Some peel off easily, while others are a bear. You can bet I'll try this tutorial next time I need to peel labels off bottles.

Garden

I never did jump on the pallet gardening train...mostly because I worried they'd look too silly (and that the dog would tear all the plants out...ahem). But I love this idea of turning a pallet into shelving for potted herbs. Is it spring yet?

Cooking

When Mike and I were in Italy, we had some amazing gluten-free pizza. The crust was so chewy and delicious, we had to double-check to make sure it was gluten-free. (It was. More about it soon.) Since then, I've been searching for a recipe to try. This one's next on the list. 

What caught your eye over the weekend?

Couscous with Spinach and Feta

This recipe is such an old favorite, I can't believe I haven't' shared it with you before. The ingredient list is a little lengthy, but every ingredient is worth it, and it really doesn't take that long to prepare, unless you're cooking the meat while you make dinner. I usually use some leftover meat - just about anything will do. The original recipe called for chicken, but I love it with leftover lamb, beef, or even venison.

Couscous with Spinach and Feta


Ingredients:

  • 8-12 ounces beef, chicken, or lamb, cooked
  • 2 tablespoons olive oil
  • 1/2 cup gluten-free couscous (I use this. If you're not gluten-free, regular or Israeli couscous would be good too)
  • 1 shallot, minced
  • 3 garlic cloves, minced
  • Zest of one lemon, plus the juice
  • Pinch red pepper flakes
  • 6-8 ounces baby spinach
  • 2 ounces feta cheese, crumbled


In a medium pot, saute the shallot in the olive oil until it begins to soften. Toss in the garlic, half the lemon zest, and red pepper flakes, and saute until the garlic becomes fragrant, about 30 seconds. Stir in the couscous and toast for about one minute. Add 1 cup water (or the amount recommended on the package), and bring to a boil. Lower the heat to the lowest setting, cover, and let sit about 15 minutes, or until the couscous is cooked.

When the couscous is cooked, stir in the spinach, a handful at a time, until it is all wilted. Remove the pan from heat, and stir in the meat and half the feta cheese.

Divide between two plates. Top with the remaining feta cheese and drizzle with the remaining lemon zest and lemon juice.

Makes two generous or three modest portions. Can easily be doubled (or tripled) to serve more people. Keeps well one or two days in the fridge.


Spinach-Avocado Sushi


I've discovered the secret to making sushi with leafy vegetables as a wrap instead of sushi nori - wilt the leaves first! If the leaves are still fresh and crunchy, they don't like to stick to each other or the rice. But when you wilt them slightly, then lay them flat on top of each other, they make a pretty nice sheet for sushi. If you're going to try this, you'll need either large spinach leaves or to lay the leaves several deep and wide - you want it wide enough to wrap all the way around your filling.

A yummy alternative if you don't have nori on hand! Enjoy!

Merry Christmas!


I hope your Christmas is all things beautiful and bright. Winter Solstice was this weekend, meaning the days will only get brighter from here. It's decidedly a white Christmas here.

We're taking it easy this year, more or less. We've done so much traveling for the wedding, that it's nice to curl up on the couch with Odie at our feet and not worry whether the snow will close the airport. 

But just because we're not going anywhere, doesn't mean that we're not celebrating. There are flowers all over the house. Cut flowers, cyclamen, an amaryllis, and paperwhites being forced in the basement. And I love holiday food. The week before spent making pies, fudge, mac and cheese, all the comfort food we ration throughout the year, all piled up on the table to enjoy all at once.  Just for kicks, here's this year's Christmas menu:

Appetizer:
  • Deviled Eggs

Main Course:

Side Dishes:

Dessert:

Shhh! It's a Super-Secret Ginger Snap Recipe!

Happy Christmas Eve! In the spirit of Christmas, I'm sharing my "secret" ginger cookie recipe. It plays a big part in the holiday season, as I like to give them away, bring them to holiday parties, and even use them to make pie crusts for sweet potato pie. 

When I was a kid, I loved gingerbread from Colonial Williamsburg. The gingerbread was the size of a large biscuit (the Southern kind, not a British biscuit which is really a cookie), and dense. Denser than pound cake, and dry, like it had so much flour packed into it. Wanting to replicate those cookies, I tried a couple of recipes, and ended up with a molasses-based ginger cookie instead. Folks seemed to think it was better than the real thing. I made them all the time as gifts, as a church fundraiser, and just for the fun of it.

Fast forward ten years, and I started hankering for a gluten-free version. Just for the heck of it, I figured, I'd come up with my own. Well. Mike liked them so much he insisted that I make them as wedding favors. Let's just say, this recipe has been tested out the wazoo. And there weren't any left over from the wedding.

So, this recipe will just be our little secret, okay? Don't be daunted by the number of ingredients - it's really pretty simple. I promise.

You start with some melted butter. Normally this would freak me out, but it's okay, because it makes the whole thing easier to stir, and we're going to chill the dough anyways. 


To the butter, we'll add some sugar and brown sugar.


Then add molasses by weight so you don't have to get frustrated when it doesn't all come out of the measuring cup, and an egg and some vanilla, and stir it all together.


In a separate bowl, weigh out the flour, measure out the spices, and then whisk them all together.


Mix about a third of the flour mixture into the liquids by hand with a wooden spoon (this is the part where we're glad we melted the butter). Lather, rinse, repeat, until you've used up all the flour.


It'll look something like this. Maybe a little darker or lighter, depending on the kind of molasses you use.


Now the hard part. Refrigerate the dough overnight. Not an hour. Not two hours. Overnight.

Once that dough is nice and cold, roll it into one-inch balls.


Roll each ball in some sugar. Keep 'em cold until they're ready to go in the oven. I often put them on a plate and stick them in the fridge until it's time to put them in the oven.


Place about two inches apart on a cookie sheet lined with parchment, and bake at 325 degrees for 11 minutes. Yep, 11 minutes. Not 10. Not 12. Eleven is the magic number for these cookies. Remove from the oven and let cool for a few minutes before moving them to a cooling rack.


Now you have some delicious, chewy molasses ginger cookies. If you prefer ginger snaps, you can put them back on a cookie sheet (they don't need to be spaced out, just a single layer is fine), turn off the heat, and let them harden overnight. 

Ginger Cookies
Makes about 3 dozen cookies

Ingredients
  • 3.2 ounces each teff flour, millet flour, and sorghum flour
  • 1 tablespoon psyllium husks
  • 1 teaspoon baking soda
  • 1 heaping tablespoon ground ginger
  • 2 heaping teaspoons ground cinnamon
  • 1/8 scant teaspoon ground cloves
  • 1/4 teaspoon salt
  • 1/2 cup butter, melted and slightly cooled
  • 1/3 cup molasses (3.5 ounces, if measuring by weight)
  • 1/3 cup brown sugar
  • 2/3 cup granulated sugar, divided
  • 1 large egg
  • 1 teaspoon vanilla


In a medium sized bowl, weigh out the flours, then whisk with the baking soda, spices, and salt. Set aside.

In another medium or large bowl, combine the butter, brown sugar,  and 1/3 cup of the granulated sugar. Add in the molasses, egg, and vanilla, stirring until well combined.

Using a wooden spoon, stir in a third of the flour mixture until well combined. Repeat, using about a third of the flour mixture at a time. When all the flour has been incorporated, cover the dough and refrigerate overnight.

When ready to bake the cookies, preheat the oven to 325 degrees Fahrenheit, and line two cookie sheets with parchment paper. 

Roll the dough out into 1-inch balls, then roll each ball in the remaining 1/3 cup of sugar. Keep the dough cold until the cookies are ready to go into the oven.

Place each ball about 2 inches apart on a lined cookie sheet. Bake for 11 minutes.

Allow the cookies to cool about five minutes on the baking sheet before transferring to a wire cooling rack.

If you want ginger snaps instead of chewy cookies, bake all the cookie dough first. Then, arrange the cookies in a single layer (they don't have to have any space between them) on several baking sheets, then return to the oven. Turn off the heat immediately, and leave them to cool and harden several hours or overnight. Ginger snaps like this make an excellent sweet pie crust.


Fully Loaded Cornbread Muffins

Some folks might just think this is sacrilege. After all, cornbread in its purest form is just cornmeal , salt, baking soda, egg, buttermilk, and oil. That's the way cornbread was when I was a kid, and frankly, I was only interested in it if it was drenched in butter and honey. Not a bad way to go, but do indulge me here. I like to have fun. 

And I think you'll have fun with this recipe, too. The whole corn kernels give a nice juicy pop when you bite into them, the caramelized onion accents the sweetness of the corn, and the jalapeno gives it a  nice little kick to keep you on your toes. And the cheese. Of course there's cheese. The individual muffin size makes everything more fun, plus it's perfect for popping into a bread basket and passing around the dinner table - if they make it that far! So dig in, get your hands a little dirty, step off the beaten path, and give these cornbread muffins a try!

Fully Loaded Cornbread Muffins


Ingredients:
  • 1/2 cup cornmeal
  • 1/2 cup gluten-free flour blend
  • 1/4 teaspoon salt
  • 1/4 teaspoon baking soda
  • 1 tablespoon sugar
  • 1/2 cup onions, caramelized
  • 1/2 jalapeno, seeded and finely chopped
  • 1/2 cup corn
  • 1 tablespoon chopped chives
  • 1/2 cup buttermilk
  • 1/4 cup +1 tablespoon butter, melted and slightly cooled
  • 1 egg
  • 1/2 cup shredded cheddar cheese
Preheat oven to 375 degrees Fahrenheit. Pour about a half teaspoon of vegetable oil into the bottom of each depression in your muffin tin. Place the muffin tin in the oven while it preheats. 

Sift together the cornmeal, gluten-free flour blend, salt, baking soda, and sugar. Stir in the onions, jalapeno, corn and chives. 

In a separate bowl, whisk together the buttermilk, butter, and egg. Stir this mixture into the cornmeal mixture. Spoon into the muffin tins, then top with the cheddar cheese.

Bake 15-17 minutes.

Makes about 12 muffins. Serve with BBQ & coleslaw, Brunswick stew, or just enjoy as you would any old dinner roll - except these are anything but ordinary!

Kale & Herb Ricotta Cheese

Kale & Herb Ricotta Cheese...it sounds so pretentious, doesn't it? Well, hold up a minute, because this is amazing. And there's really not that much to it. Plus, you can use it on anything...

Spread on toasted gluten-free English muffins...


As ravioli filling...


Or just eaten out of the jar whenever the urge for a snack hits you. (Not that I would do that...)

You can definitely use store-bought ricotta here, but I used this recipe to make my own because I felt like playing around in the kitchen. Either way. Just be sure you try it out!

Kale and Herb Ricotta Cheese

This little recipe was inspired by some gluten-free chard and ricotta cannelloni I had while in Italy. I usually don't care much for chard, but ordered it anyway to be an adventurous eater. Anyways, the chard was chopped up into such tiny pieces I didn't mind it at all - in fact, I enjoyed it! You could certainly use a chard leaf or other dark green here. Let your imagination run wild!


Ingredients:

  • 1 cup ricotta cheese
  • 1 leaf lacinto kale (aka "Dino" kale), finely chopped
  • 1 tablespoon finely chopped parsley
  • 1/4 teaspoon salt
  • Pinch onion powder
  • Pinch garlic powder
Put the kale into a medium skillet and place over medium heat, just until it starts to wilt and then sizzle. Remove from heat and stir in the parsley, salt, onion powder, and garlic powder. Let it cool, then stir into the ricotta. 

Use on pizza, toast, as pasta filling, or as a sneaky snack. Keeps in the fridge for about a week - not that it'll last that long!


Risotto alla "Bambi"

Last week, I made a shrimp risotto and utterly failed to take a decent photo of it. This week, I made some venison risotto. It was supposed to be my redemption photo shoot. Until the camera battery died. Ugh. This is as good as it's gonna get, I'm afraid:


Anyways, this is a "leftovers" meal. My brother shot the deer, and the tenderloin has been hanging out in my parents' freezer since last hunting season. When I was home last weekend for a dear friend's wedding, my dad cooked it for Sunday dinner. Which, if you're from the South, you know is just a big lunch on Sunday, but we call it dinner.

The original dish Dad cooked is a venison tenderloin, cut into 2-inch chunks, then wrapped with half a piece of bacon, and held together with a toothpick or two. It goes on the grill, turning a couple of times so the bacon gets crispy, until the venison is medium or medium-rare. The fat from the bacon helps keep the lean venison moist, and the whole thing is so delicious it'll make you swoon.

No-Stir Mushroom Risotto with Seared Shrimp

Guess what, y'all. Food photography is hard. Even Martha Stewart has trouble taking a good food photo on her own. You know what's even harder? When it's December already, and there's only light from 8 a.m. - 5 p.m., and you want to take a picture of your 7 p.m. dinner before it gets cold. Whoever heard of such a thing? Sheesh. Anyways, that's really just a long-winded explanation for why there's no photo with this recipe. (Even though it still looks better than Martha's. Sorry, Martha.) 

Instead, here's a picture of Odie, looking cute. Which is what he does best, daylight or no daylight.


No-Stir Mushroom Risotto with Seared Shrimp

Serves 2 with a little left over, but you could easily double or triple the recipe

Until I tried this technique, risotto had eluded me. The idea here is that you get most of the effect of a creamy risotto quicker, and with less work. Sign me up!

For the Risotto:
  • 1 small onion
  • 4 ounces mushrooms
  • 1/2 bell pepper
  • 1 tablespoon olive oil
  • 1 cup water
  • 2 tablespoons heavy cream
  • 1/2 cup short-grain rice, such as Arborio 
  • 1 tablespoon butter
  • 1/2 cup grated Parmigiano-Reggiano cheese, finely grated
  • Salt and pepper, to taste

For the Shrimp:
  • 1/2 pound shrimp, peeled and deveined
  • 2 tablespoons cornstarch
  • 1/2 teaspoon coarse sea salt
  • 2 tablespoons oil or lard, for frying
Lay the shrimp evenly on a couple of paper towels. Put several paper towels on top of them, then weight with a heavy pan, like a cast iron skillet.

Meanwhile, chop the onion, mushrooms, and bell pepper finely. Combine in a small saucepan with the olive oil, and saute until they have released all their liquid and are beginning to dry out. Add the cream, water and a pinch of salt, then bring to a boil. Once the liquid comes to a boil, add the rice, give it a quick stir, then cover and lower the heat to a simmer. Cook for 14-15 minutes, or until al dente.

When there are five minutes left for the rice to cook, combine the cornstarch and sea salt in a shallow bowl. Toss the shrimp in the cornstarch so it is lightly coated. Heat the frying oil in a large skillet until it is almost smoking. Sear the shrimp, about a minute on each side, until they are golden brown, then remove from the pan and drain on fresh paper towels.

When the rice has finished cooking, add the butter and cheese, stirring vigorously so the melt evenly into the rice. 

Serve the rice in a shallow bowl topped with the shrimp. Salt and pepper to taste. Serve while it's still piping hot. 

If you have any leftover rice, you can make fried rice balls the next day. The possibilities are endless, but the basic idea is to heat up some oil, 


Season some breadcrumbs...


Form the rice into balls (some recipes even have you stuff them with cheese...yum!)


Roll those balls in the breadcrumbs...


Then fry.


Any way you slice it, it's good! Enjoy!

By the Way...

If you're wondering whether I'd dropped off the radar a bit, I did. I had the blog running on autopilot a bit, and also...got married, went on a honeymoon to Italy, had Thanksgiving with my family in Virginia, and then made my way back to Salt Lake City! Whew!

It's been a crazy couple of weeks, and I have so much to write about. Hopefully I get to even a third of it. There were wedding DIY projects, parties after parties, all gluten-free, gluten-free restaurants, and sightseeing, and more. I came back from Italy wanting to make everything I couldn't eat there gluten-free, and I'm currently swimming in Italian cookbooks working to make that happen. Plus, I'm happy as a clam playing with every single new kitchen toy we got as wedding presents. Now I realize why newlyweds always complain about gaining weight!

Despite all the fun new toys and growing list of dishes to try, after all our eating in Italy and again at Thanksgiving, I'm ready for some lighter fare. Since winter is quickly approaching, that doesn't necessarily mean salads, although we are enjoying some with our meals. Right now, lighter fare means smaller portions and more vegetables. So here's a simple roasted cauliflower recipe:


Wash a head of cauliflower, then remove leaves and stem. Slice the head into 1/2 inch slices, then cut each slice into smaller pieces at the base of the stems. Spread evenly in a single layer on a baking sheet, drizzle with olive oil and sprinkle with salt, then pop into a 400 degree oven for 10 minutes. Turn the cauliflower pieces over, drizzle with olive oil and sprinkle with salt again, and roast another 10 minutes. You can cook them a little shorter or longer, depending on how browned you like them.

Makes an excellent veggie side, or you can let the roasted cauliflower cool, then pulverize it in a food processor to make "rice." OR you could use the pulverized cauliflower for a pizza or quiche crust - just mix in an egg, then spread in the bottom of a pan and bake at 350 degrees for 10 minutes or until the crust is firm. I find this works better than the recipe I've seen floating around Pinterest, since roasting takes care of some of the excess moisture and brings out all those delicious sugars!


Updated: Cranberry Orange Muffin Recipe

Got any leftover cranberries? If you're like me, there was no cranberry sauce, leaving lots of cranberries for other things, like my favorite, cranberry orange muffins...I totally stock up on cranberries this time of year so I have them all year round.

About a month ago, I posted a recipe for cranberry-orange muffins. When I went to make them today, I realized I hadn't given any of the liquid ingredients in the recipe! Silly me.  The recipe in the link is fixed, but here's the recipe just in case:

Gluten-Free Cranberry Orange Muffins

Ingredients:

  • 160 g gluten-free flour mix (I used the white flour blend* from Gluten-Free Girl Every Day)
  • 30 g flaxseed meal
  • 1/4 t baking powder
  • 1/4 t baking soda
  • 1/8 t salt
  • 1 T psyllium husks
  • 1/2 c sugar
  • 1 T orange zest
  • 3 T butter, melted and slightly cooled
  • 1/2 c buttermilk
  • 1 egg
  • 1/2 t vanilla extract
  • 1 T orange juice
  • 1/2 c cranberries

For the crumble:

  • 2 T cold butter
  • 2 T gluten free flour
  • 1/4 c sugar
  • 1 T cinnamon
  • 1 t orange zest
  • pinch salt

Preheat the oven to 350 degrees Fahrenheit.  Line a muffin pan with papers.

Prepare the crumble: cut the butter into the sugar, then stir in the remaining ingredients. Set aside.

In a medium bowl, whisk together the orange zest and sugar. Whisk in the remaining dry ingredients.

In a separate bowl, whisk together the buttermilk, egg, butter, and vanilla.

Pour the liquid into the dry ingredients. Stir half-way and add the cranberries. Stir very gently until combined.

Use a spoon to divide the batter evenly among the prepared muffin tins.

Top with the crumble, pressing lightly on the tops.

Bake for 15-20 minutes, or until a toothpick inserted into the center of a muffin comes out almost clean.


*I've also used their whole-grain flour mix, and that turned out well, too.

Creamy Mushroom and Roasted Garlic Soup

This soup may not look like much, but boy, is it delicious. Hot, creamy, and filling, it's the perfect thing for a fall evening. Pair with some crusty gluten-free toast, and you have yourself a tasty meal.

I highly recommend roasting several heads of garlic ahead of time. They store forever, and taste great with everything - spread on toast, added to soups as I do here, or just for a subtle garlic flavor in other dishes. Not sure how to roast garlic? Check out this great tutorial.

Creamy Mushroom and Roasted Garlic Soup


Serves 4

Happy Desk Salad - Arugula Salad with Proscuitto, Basil, and Goat Cheese

Maybe you've heard of Sad Desk Salad. I'm reading it now. Luckily, I don't work (or blog) in such a charged environment, but the concept of being stuck at your desk for lunch definitely resonates. Also in the news of eating lunch at your desk, you should only do it if you make the conscious decision to do so. 

If you find yourself at your desk for lunch, one way or the other, a great salad can go a long way in making the experience a decent one. It's just as easy (if not easier) than walking across the street to the bodega for a  limp salad - just throw some great tasting greens in a container, roll the meat into some plastic wrap, and put the dressing in a separate container. Mix it all together at your desk, and voila - a happy desk salad. It's crisp, satisfying, and totally free from despair.
This salad just so happens to have some kale and chive sprouts from my garden - a lucky coincidence of needing to thin out veggies. But it would be equally delicious with just the arugula and mesclun mix.
Arugula Salad with Prosciutto, Basil and Goat Cheese