Showing posts with label breads. Show all posts

Our Italian Restaurant(s): Florence, Part Four

Let's be real. The best part about Italy was the food. It seemed like we started the day with a big spread at our hotel (where there was always hot cappuccino, and gluten-free options for me), and then we spent the rest of the day figuring out what our next culinary indulgence would be. In between, we checked out some famous - and amazing - historical sites, museums, and churches, but it was really all about the food. In this series, I'll share the amazing meals we had, just in case you're planning a trip to Italy anytime soon ;)

The Club House might have had our favorite pizza ever, but Giannino in San Lorenzo had the most and best to offer for a gluten-free eater. It was so good, we went there twice.

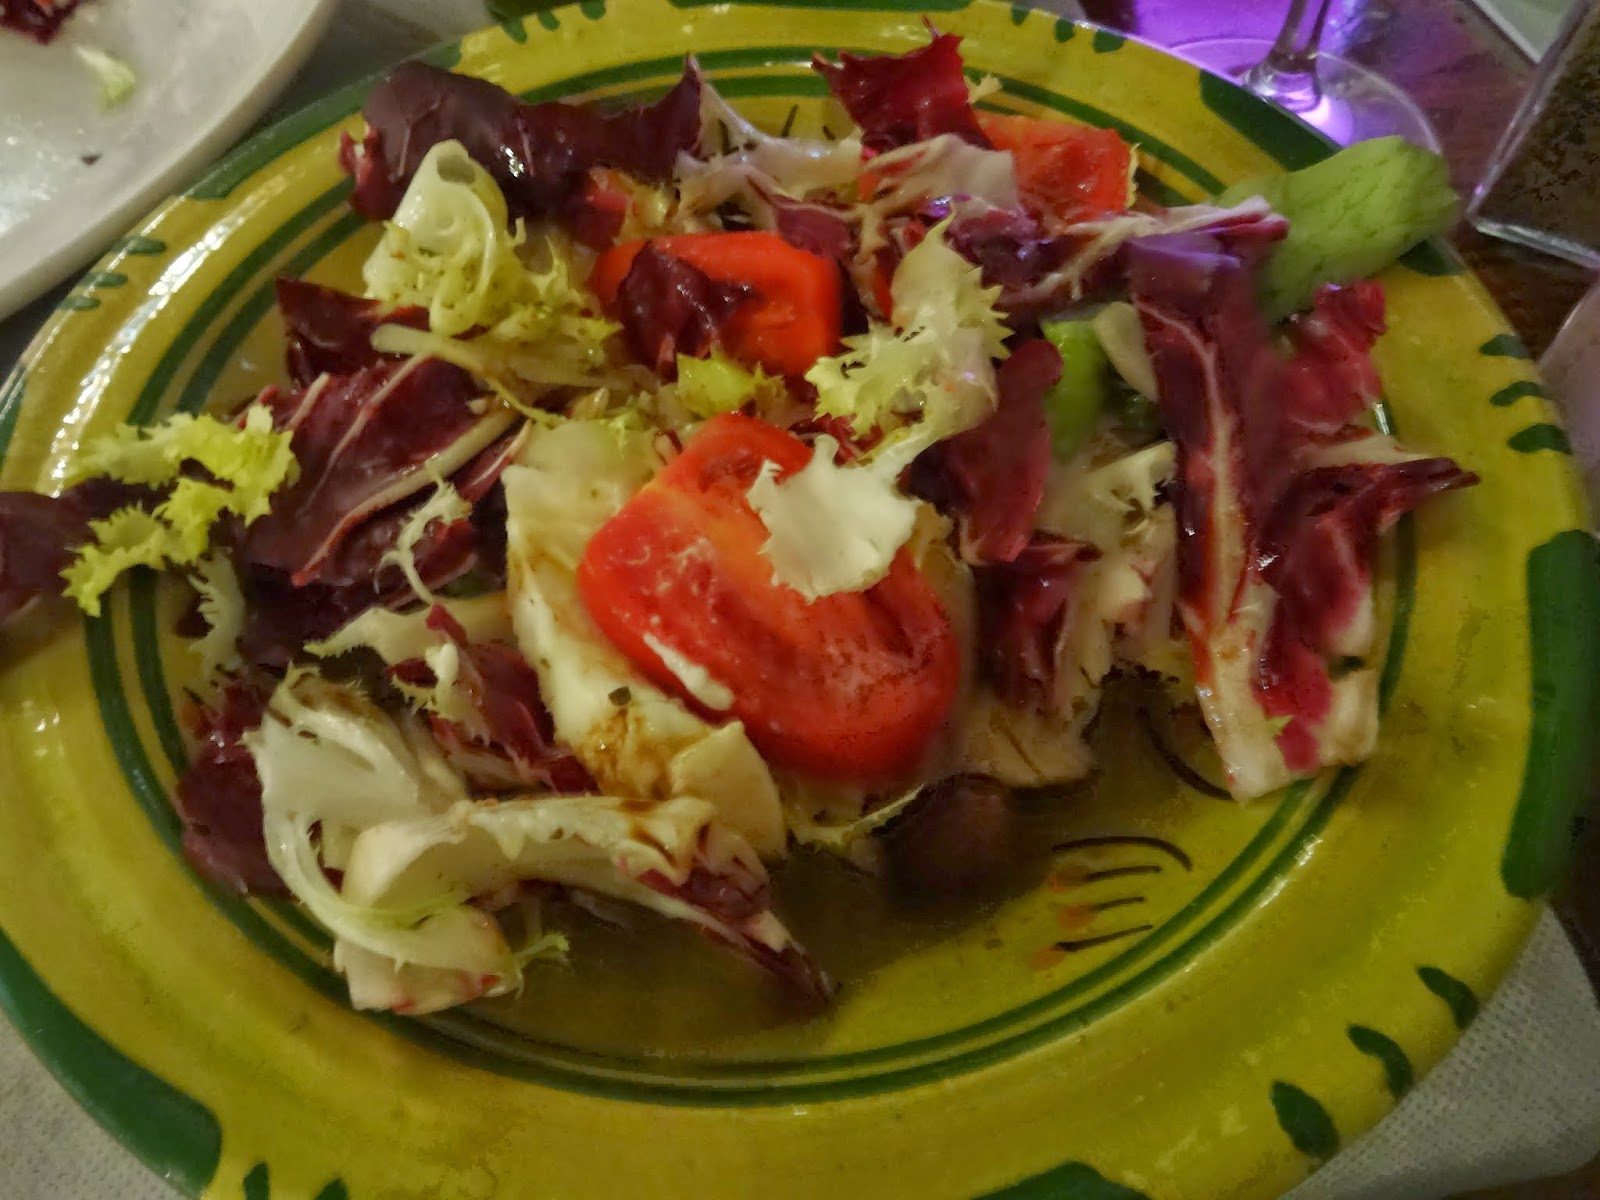
Both times, we split this amazing caprese salad. It came out on a bed of raddichio and frisee, and had the freshest tomatoes and tastiest mozzarella. Mike's usually not a tomato eater, but these tomatoes were so good I had to fight to get some on my plate. 

On our first visit, I had tortellini in a tomato sauce that was to die for. The tortellini was amazing too - it's been ages since I've had tortellini, since it's so hard to find gluten-free tortellini. Mike had ribollita (not gluten-free), and said it was awesome.

Our waiter even brought us gluten-free bread - a roll about the size of a hot dog bun, split lengthwise and darkly toasted. It, too, was very good.


On our second visit, we split a gluten-free prosciutto pizza. It wasn't as good as the pizza at the Club House, but it was still very tasty.

Hats off to Giannino in San Lorenzo for two delicious gluten-free meals!

Next week: Venice!


Fully Loaded Cornbread Muffins

Some folks might just think this is sacrilege. After all, cornbread in its purest form is just cornmeal , salt, baking soda, egg, buttermilk, and oil. That's the way cornbread was when I was a kid, and frankly, I was only interested in it if it was drenched in butter and honey. Not a bad way to go, but do indulge me here. I like to have fun. 

And I think you'll have fun with this recipe, too. The whole corn kernels give a nice juicy pop when you bite into them, the caramelized onion accents the sweetness of the corn, and the jalapeno gives it a  nice little kick to keep you on your toes. And the cheese. Of course there's cheese. The individual muffin size makes everything more fun, plus it's perfect for popping into a bread basket and passing around the dinner table - if they make it that far! So dig in, get your hands a little dirty, step off the beaten path, and give these cornbread muffins a try!

Fully Loaded Cornbread Muffins


Ingredients:
  • 1/2 cup cornmeal
  • 1/2 cup gluten-free flour blend
  • 1/4 teaspoon salt
  • 1/4 teaspoon baking soda
  • 1 tablespoon sugar
  • 1/2 cup onions, caramelized
  • 1/2 jalapeno, seeded and finely chopped
  • 1/2 cup corn
  • 1 tablespoon chopped chives
  • 1/2 cup buttermilk
  • 1/4 cup +1 tablespoon butter, melted and slightly cooled
  • 1 egg
  • 1/2 cup shredded cheddar cheese
Preheat oven to 375 degrees Fahrenheit. Pour about a half teaspoon of vegetable oil into the bottom of each depression in your muffin tin. Place the muffin tin in the oven while it preheats. 

Sift together the cornmeal, gluten-free flour blend, salt, baking soda, and sugar. Stir in the onions, jalapeno, corn and chives. 

In a separate bowl, whisk together the buttermilk, butter, and egg. Stir this mixture into the cornmeal mixture. Spoon into the muffin tins, then top with the cheddar cheese.

Bake 15-17 minutes.

Makes about 12 muffins. Serve with BBQ & coleslaw, Brunswick stew, or just enjoy as you would any old dinner roll - except these are anything but ordinary!

Updated: Cranberry Orange Muffin Recipe

Got any leftover cranberries? If you're like me, there was no cranberry sauce, leaving lots of cranberries for other things, like my favorite, cranberry orange muffins...I totally stock up on cranberries this time of year so I have them all year round.

About a month ago, I posted a recipe for cranberry-orange muffins. When I went to make them today, I realized I hadn't given any of the liquid ingredients in the recipe! Silly me.  The recipe in the link is fixed, but here's the recipe just in case:

Gluten-Free Cranberry Orange Muffins

Ingredients:

  • 160 g gluten-free flour mix (I used the white flour blend* from Gluten-Free Girl Every Day)
  • 30 g flaxseed meal
  • 1/4 t baking powder
  • 1/4 t baking soda
  • 1/8 t salt
  • 1 T psyllium husks
  • 1/2 c sugar
  • 1 T orange zest
  • 3 T butter, melted and slightly cooled
  • 1/2 c buttermilk
  • 1 egg
  • 1/2 t vanilla extract
  • 1 T orange juice
  • 1/2 c cranberries

For the crumble:

  • 2 T cold butter
  • 2 T gluten free flour
  • 1/4 c sugar
  • 1 T cinnamon
  • 1 t orange zest
  • pinch salt

Preheat the oven to 350 degrees Fahrenheit.  Line a muffin pan with papers.

Prepare the crumble: cut the butter into the sugar, then stir in the remaining ingredients. Set aside.

In a medium bowl, whisk together the orange zest and sugar. Whisk in the remaining dry ingredients.

In a separate bowl, whisk together the buttermilk, egg, butter, and vanilla.

Pour the liquid into the dry ingredients. Stir half-way and add the cranberries. Stir very gently until combined.

Use a spoon to divide the batter evenly among the prepared muffin tins.

Top with the crumble, pressing lightly on the tops.

Bake for 15-20 minutes, or until a toothpick inserted into the center of a muffin comes out almost clean.


*I've also used their whole-grain flour mix, and that turned out well, too.

Pumpkin Fatigue

It's pumpkin season. Pumpkin carving, pumpkin spice lattes, pumpkin cake, pumpkin pie. That's a lot of pumpkin.

I'll let you in on a little secret: I don't much care for pumpkin. There, I said it. It's true. While everyone else is chowing down on pumpkins, I'd much rather be eating something else. Like cranberry-orange muffins. Now there's a Starbucks goodie I used to go nuts over. And then...it wasn't there anymore. And then...I had to eat gluten-free.


I've tried my fair share of gluten-free cranberry-orange muffin recipes, but I quite like this one. It's got a great crumb, but it still holds together, which is always a feat for gluten-free baked goods. With a cinnamon crumble topping, it still has a little taste of fall.  Popped in the toaster oven, it rivals any and all things pumpkin.

Yet More Goodies

I'm slowly cooking my way through Gluten-Free Girl Everyday, and boy, is it good. This time around, I made half a recipe of pizza dough. Half of that made two "personal" sized pizzas (they were just a tad big) and the other half made flatbread.


The pizza was topped with garlic butter (instead of tomato sauce) mozzarella cheese, cheddar cheese, caramelized onions, bacon, and scallions. The crust was crispy on the outside, and chewy on the inside. Just the way I like it.


There was just enough left over for four smallish pieces of naan, something I thought I'd never have again. (At least not that tasted good.) It needed just a touch of salt once it came off the skillet, but it too was excellent.

Like most gluten-free baked goods, these really taste good when they're warm. But boy, are they good.

Flaky Pie Crust

I have to admit, I never used to care much for pie crusts in my pre-gluten-free days. It always seemed so uninteresting, so bland, just something to hold in pie filling. Graham cracker crusts were a different matter, of course. But on the whole, pies and quiches didn't really appeal to me because they were wrapped up in such an awful crust.

Not so anymore. I've been making quiche almost every week. It's the perfect vehicle to use up leftovers, plus it can be breakfast, lunch, or dinner. I usually make a quiche on the weekend, then eat it for breakfast all week long. Sometimes, when I don't have time to fix dinner, it's great to just be able to heat up a slice of quiche, and dinner is served.

I've been using this crust recipe for the whole time, but I've made so many changes to it that mine is a completely different beast, so I thought I'd share it here. Unlike the pie crusts of old, this one is flaky and buttery and I just can't seem to get enough of it.

And if you've always thought pie crust is too hard, you couldn't be more wrong. Once you get the hang of it, you can crank one of these bad boys out in twenty minutes or less.

Flaky Gluten-Free Pie Crust


  • 1/3 cup millet
  • 1/3 cup potato starch
  • 1/2 cup white rice flour
  • 2 tablespoons tapioca flour
  • 1 tablespoon psyllium husk
  • 2 tablespoons flaxseed meal
  • 1/4 teaspoon salt
  • 1 teaspoon sugar
  • 6 tablespoons cold butter, cut into 6 pieces
  • 2 eggs, lightly beaten
  • 2 teaspoons lemon juice
  • 2-3 tablespoons heavy cream

Preheat oven to 350 degrees Fahrenheit. Grease and flour a pie plate using butter and any gluten-free starch (corn, tapioca, potato...it doesn't really matter).


Whisk together the dry ingredients. Using a pastry cutter, cut in the butter until the butter pieces are about pea-sized. Mix in the eggs, then the lemon juice, and then the cream, about a tablespoon at a time. You want the dough to come together to form a ball, but still be slightly dry, not wet and sticky. Avoid overmixing - you don't want to break up the butter too much, or the crust won't be very flaky.

Once all the ingredients are incorporated, roll out the dough between two pieces of waxed paper. You want the crust to be a little more than a quarter of an inch thick. Peel off the top layer of waxed paper, put the pie plate facedown on the dough, then flip it all over, gently pressing the dough into the plate.

Peel off the remaining waxed paper, then quickly smooth out any holes in the crust using extra dough. You want to be quick so the heat from your fingers doesn't melt the butter. Keeping the butter cold and working quickly helps you get that flaky crust. Use the tines of a fork to pierce holes in the bottom of the crust, and if you like, press down the edges of the crust to get a fluted look.

Bake at 350 degrees for about 10 minutes. Voila - you have a pie crust ready for any filling you can think of!


Here's what the mixture should look like after you've cut in the butter. Some folks use two knives or even their fingers, but I prefer a pastry cutter.


Dough ready to be rolled out


 Waxed paper keeps it all together and helps the dough keep from sticking to the rolling pin.


The hardest part...just go for it! No matter how good you get at it, there will always be some piecing together, so don't worry if it's not perfect. Even Julia had to work at it.


Use extra scraps to fill in the holes.


I love a nice fluted crust...


Poking holes in the crust helps keep the bottom nice and flat


And there you have it! A crust, just begging for some filling!


Bread Soup


A bastardization of these soups...delicious. Bread and cheese tossed in just when it's time to serve.

Pinterest Fail

Ah, Pinterest. Like so many others, I find it at once incredibly useful and terribly depressing. Why don't my projects come out like that? Why can't I shoot photos that well? 

I have an answer. I don't stay at home all day, I don't have unlimited resources, and this stuff I do is just a hobby. That doesn't mean that I don't care if it looks nice (I do), but it does mean that if a project's not working out, I go to plan B.

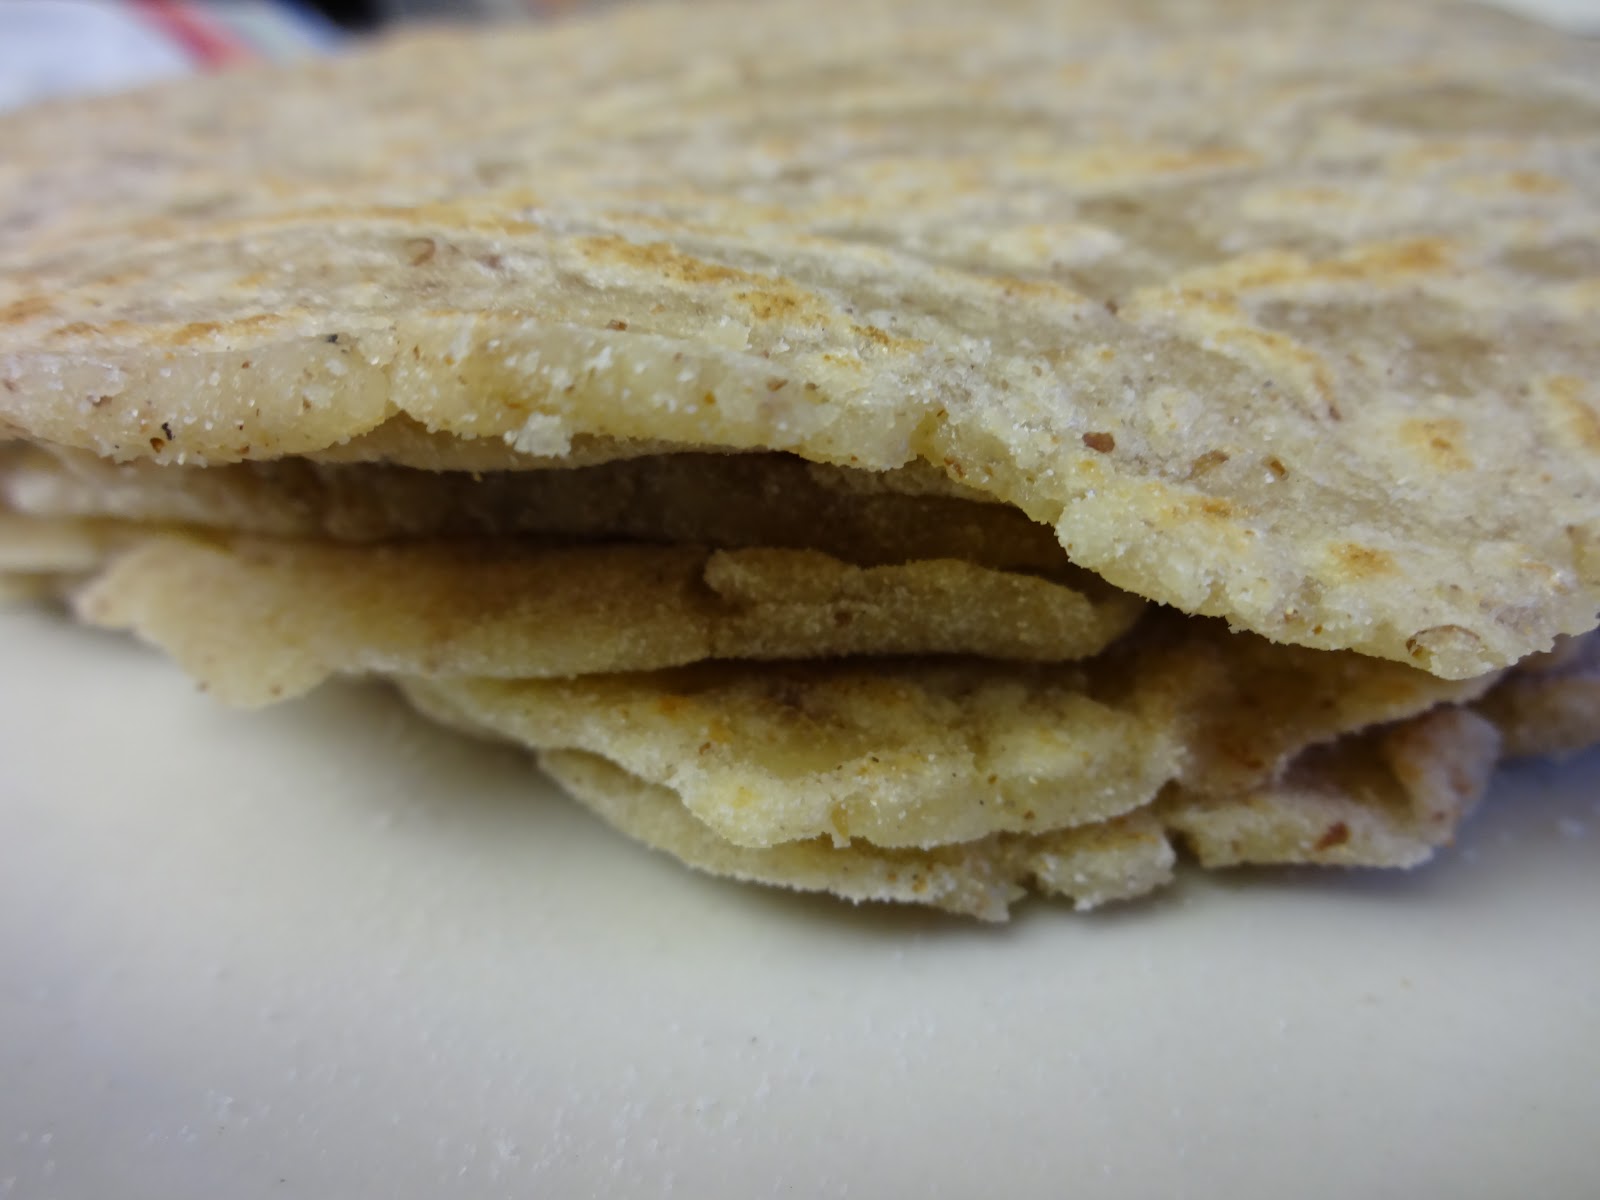
Like this recipe, as seen on Pinterest. I was going to make some stellar tortillas, and then make an awesome bacon-avocado-egg wrap with them. 

So I mixed up some batter, poured it in the pan, and let it do its thing. So far so good.


Until I tried to flip it.


Ick. And guess what - it tasted wayyyy too much like coconut for me.


At least my avocado was pinterest-worthy. And a nice change from looking at pictures of perfectly manicured hands curled around a bottle of nail polish.


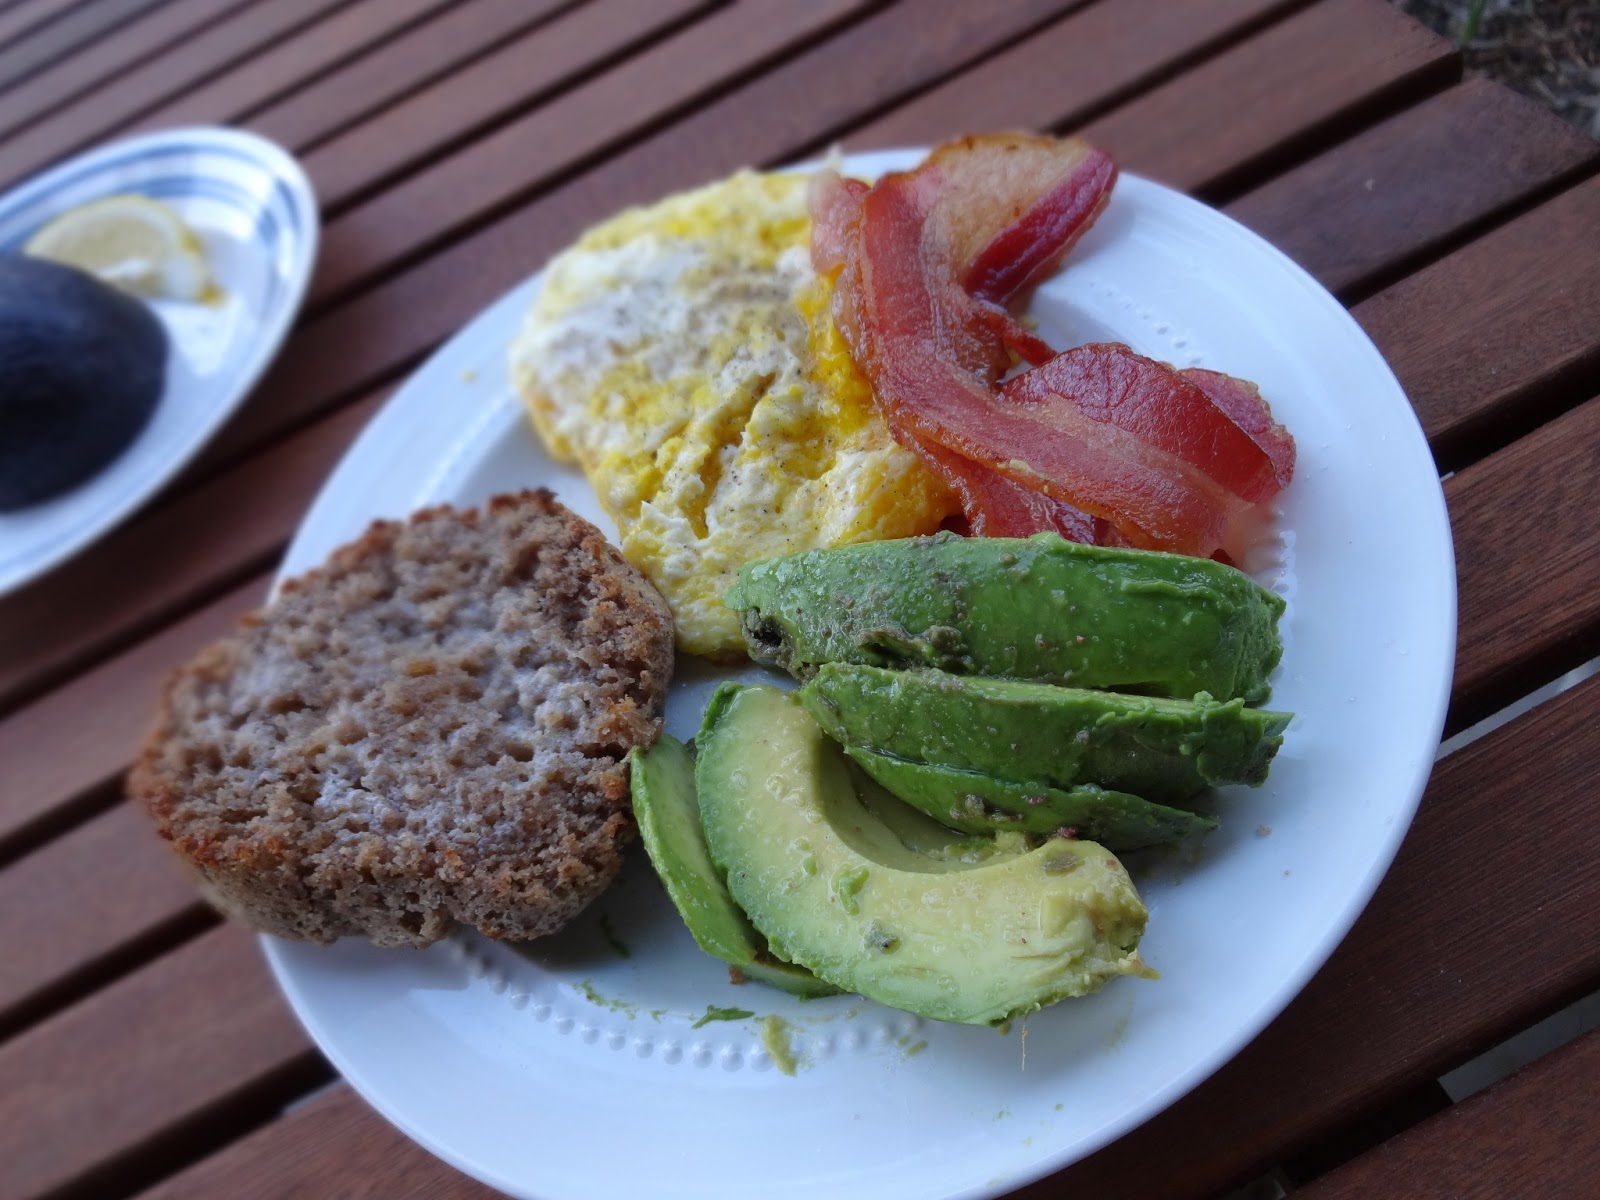
So instead of my pinterest-inspired wrap, I had bacon, eggs, avocado, and a toasted gf English muffin. Maybe it wasn't perfect or even pinterest-worthy, but it was delicious.


And ultimately, isn't that the point of enjoying life? Not so much to show others how good it looks, but to actually enjoy it...

French Toast, Gluten-Free

Maybe this goes beyond stating the obvious, but making French toast gluten-free isn't that much different than making it the "normal way." Stale bread, eggs, milk, frying pan, and done. Maybe some cinnamon sugar and fruit if you're lucky.

I don't know about you, but my best ideas come to me when I'm staring at the fridge. It's like the ideas that come to you in the shower, or right before you go to bed. Mine come to me when I'm standing there, letting all the cold air out, absentmindedly surveying its contents.

Remember that bread I made? It was amazing right out of the oven, but then it dried out pretty darn quick. I avoided using it, and then one night I was staring at the fridge, wondering what to make for dinner, not really wanting to cook but definitely not wanting to go out to eat either. And then the lightbulb went off in my head - French toast. Quick and easy, and a great way to use up stale bread.


I added some honey, vanilla, and cinnamon sugar to the egg mixture. The best French toast in my book has lots of cinnamon sugar, so I sprinkled it liberally over the toast when it was done too. And the last of the raspberries from the freezer graced the top (and their juice combined with honey made a great syrup).


I made bread!

There is no recipe for this one. There's no trying. We ran out of bread, and the store was out of the kind I normally buy, so I decided I could make my own for a change.

There's just one thing. My idea of a recipe is more like a suggestion. A guideline. An estimate of what you'll need, how long it might take, and the temperature at which you might consider cooking it. 

Guess how well that goes with baking gluten-free bread?

Not as bad as you might think, as long as you're willing to really work at it. I decided, in all my brilliance, to use potato flour, which apparently sucks up twice as much moisture as any other gluten-free flour I've ever used. Which meant there was an immeasurable amount of extra liquid - beer, milk, olive oil - that went into the dough.


When it first came out of the oven, I couldn't stop eating it. Alas, after a night in the fridge it had dried out considerably and turned into something that resembled slightly moist cardboard.

But still. I made bread!

Gluten-Free Cheddar Garlic Biscuits

Once upon a time in college (oh, college), my friends and I loved to head down the street for dinner at Red Lobster. It didn't break the bank, the seafood was decent, and then there were those biscuits. You know, the free kind that show up on your table and never end. We drove the waiters nuts because we would gorge ourselves on those biscuits, hide them under the table and in our doggy bags in hopes of some to take home with us. 

A few years down the road in law school, I came across a copycat recipe for those biscuits, and it ended up being my signature party contribution. Whenever I asked friends what I could bring to a party, it was those biscuits. And I never had leftovers.

Here's my gluten-free version. They're a little darker than what you might be used to, but I'm not bragging when I say these are the best gluten-free biscuits I've ever had. They don't crumble to dust the way my previous gluten-free biscuits attempts have, and between all the cheese and the butter you really can't go wrong. 

I got 12 biscuits out of this recipe, but I made them big. You could make them smaller, and adjust the cooking time accordingly. 

Gluten-Free Cheddar Garlic Biscuits


Makes 10-12 biscuits

For the biscuits:
  • 3/4 cup sorghum flour
  • 3/4 cup potato starch
  • 1/2 cup quinoa flour
  • 1 tablespoon psyllium husks
  • 2 tablespoons flaxseed meal
  • 1 tablespoon baking powder
  • 1 teaspoon salt
  • Pinch garlic powder
  • 5 tablespoons cold butter, cut into pieces
  • 2 cups coarsely grated cheddar cheese (about 5 ounces)
  • 2/3 cup whipping cream
  • 1/4 cup 2% milk
  • 1 tablespoon vinegar
  • 3 eggs

For brushing on the biscuits:
  • Melted butter (about 3 tablespoons)
  • 1 teaspoon dried parsley
  • 1/4 teaspoon garlic powder
Preheat oven to 400 degrees Fahrenheit.

In a medium bowl, combine the cream, milk, and vinegar. Let stand five minutes, then whisk in the eggs. 

Whisk together the dry ingredients in a large bowl. Cut in the butter until the pieces of butter are about pea-sized. Mix in the cheese.

Stir in the wet ingredients until well incorporated. Let stand about five minutes. Use an ice cream scoop or large spoon to drop balls of dough onto a lined baking sheet. Bake for 15-17 minutes, brushing on melted butter, parsley, and garlic in the last few minutes of cooking. 

Serve hot, or reheat leftovers in the toaster. Pairs pretty darn well with a romantic candlelit lobster dinner.


Homemade Pantry: 101 Foods You Can Stop Buying and Start Making

I love a cookbook with a story. And I love a cookbook with good pictures. Even better is a cookbook that has both. What's more, Alana Chernila's sensibilities about food speak to my own. Food doesn't have to be expensive to be delicious, and food made from scratch with love is almost always vastly superior to the store-bought kind.


I stumbled across Homemade Pantry: 101 Foods You Can Stop Buying and Start Making through another blog I read, and instantly put it on my "books to buy" list. (They're almost all cookbooks. The rest I try to check out from the library.) My little brother gave it to me for Christmas, and I immediately read the entire thing from cover to cover.

Homemade Pantry contains a lot of recipes I have down pat, or similar to those in other cookbooks I own. And I will have to tweak many of the recipes because they call for wheat flour. But that's not the point. The point is the approach to cooking, how food relates to everyday life in so many ways, how it can nourish our bodies and relationships with each other. As an added bonus, there are plenty of recipes I have tabbed that don't require any modification, like the oven baked potato chips that have my mouth watering just thinking about them.  Plus, Chernila walks you through difficult spots (she calls them "tense moments") that might come up in cooking the recipes, and gives tips on what to do with scraps you might otherwise send to the landfill. She knows nobody really lives that perfect at-home life so many bloggers portray, so she also tells you how long each dish keeps in the fridge and freezer for those nights when you wish dinner would make itself.

The entire book is infused with Chernila's family memories as they relate to food and life in general. Not only do I see myself cooking from this cookbook for years to come, I see myself re-reading the stories too.

Gluten-Free Flour Tortillas


I'm sick and tired of the gluten-free "flour tortillas" I buy at the supermarket. They're strange, pasty things that don't brown. They taste awful, and worst of all, they're so brittle I can't bend them at all without breaking them. What's the point of a tortilla you can't bend?

These tortillas, on the other hand, taste pretty darn good. When they're warm, you can actually roll them all the way up for burritos, enchiladas, whatever you like. And they even get those little brown spots the way tortillas are supposed to. A word of warning, though - they don't keep. Make right beforehand if you want them to be flexible. Otherwise they dry out and get almost as brittle as the grocery store ones.

This recipe is for 8 tortillas, but you could easily double it.

  • 1/2 cup quinoa flour
  • 3/4 cup sorghum flour
  • 3/4 cup potato starch
  • 1 tablespoon psyllium husks
  • 2 tablespoons flaxseed meal
  • 1/2 teaspoon baking powder
  • 1 teaspoon salt
  • 2 tablespoons butter
  • 2 tablespoons vegetable shortening
  • 3/4 cups warm water, plus an extra 1/4 cup
  • Rice flour or other gluten-free flour, for dusting
Combine the dry ingredients. Cut in the butter and shortening using a pastry cutter until the fat is broken down into pea-sized lumps and is well incorporated into the flours. Slowly add 3/4 cups water, mixing as you go. Add the remaining 1/4 cup a tablespoon at a time if you need it. The dough should look wet and sticky but not slimy. Cover and let sit about ten minutes.

Using the rice flour, flour a large flat surface. (You can use your counter but I use an old tea towel.) Shape the dough into 8 balls, then cover and let stand about five minutes.

Working on your floured surface, shape the balls into flat discs, using your fingers or a rolling pin. work from the center outward, and stop when the disc is about eight inches in diameter and no thinner than 1/16". 

Heat an ungreased skillet over medium heat, then fry the tortillas about a minute on each side, or until they begin to puff up a little and get little golden spots on them.


Oh Hey!

How long has it been?


I know, I know. When last I left off, I was tying up a cookbook kick, reading cookbooks like there's no tomorrow. I still love cookbooks (always have, always will), but I'm on to a new kick.

Remember that Happiness Project? That sort of fell by the wayside too. I'm still very interested in doing one, but it wasn't the easiest thing to fall into the habit. For now, I'm focusing on being mindful of my mood. Maybe another Happiness Project will surface later on.

What I'm really doing right now is trying to plan a wedding (gluten-free) on a budget, from halfway across the country. Without going crazy. Sounds like fun, right?

Add holiday craziness to wedding planning craziness, and most days I'm just beat. I know I'm not getting enough fruits and vegetables (especially the vegetables). Maybe what's even sadder is that I eat more fruits and veggies than the average American, but I still don't get enough. How does that happen?

Anyways, I had toyed with the idea of doing a Whole30, but I just couldn't get behind it. No dairy for 30 days? No sugar? No alcohol? No way. But then yesterday, I watched Fat, Sick, and Nearly Dead. One of my professors had raved about it and her juice diet while I was in law school. I thought it was interesting but never got around to looking into it.

Well. The film is fascinating. Of course I know you can change your life with food. I've done it. But the results these people have had are incredible. I especially like that the program lets you choose the iteration that's right for you (three days, ten days, etc.). And I noticed something as I watched the film - nowhere do they mention it, but this diet is also gluten-free. Unless you go adding wheatgrass (I know some folks say it's gluten-free, but I'm not taking my chances), the whole diet is not only gluten-free, but grain-free as well. And grains, be they gluten-free or no, seem to be our biggest downfall. It's cultural, it's taste, it's something that keeps bringing us back.

I'm starting with a three-day juice fast, but if it goes well, I might just go for a full ten days. Hopefully I'll remember to let you know how it goes.


Weekly Meal Plan

I'm in almost over my head - figuratively and literally. I've been working, which really seems to take it out of me, but we're under about two feet of snow right now. (Remind me again why I moved to Utah?) Snow is...not my favorite thing. But Odie loves it. He also loves his new frisbee, and it was a lot of fun to watch him bounding through the snow after it.


I'm only planning four meals this week, because there's a top-secret thing going on this week... 

So this week's meals are super simple, and work mostly with what I already have in the fridge and freezer. I basically only bought broccoli and food for breakfasts and lunches at the store this week. It all starts with ribs...

Meal One: 

Oven-baked BBQ ribs with broccoli and biscuits

Meal Two:

Stir-fry with leftover beef, broccoli, and bell peppers from the freezer. Served over rice.

Meal Three:

Soup with leftover beef.

Meal Four:


I'll be in the kitchen today cooking the ribs, broccoli, biscuits, and rice. Everything else should whip up easily during the week. Happy eating!

Weekly Meal Plan: Lamb

I bought a leg of lamb at the grocery store this weekend. I had been hoping to re-do the pork shoulder of a couple weeks ago to perfect my barbecue technique, but alas, the grocery store was fresh out of pork shoulder.


Yesterday, I close-roasted the lamb. Close-roasting is a technique that's great for all kinds of meats. It's simply cooking the meat in a covered dish at a very low temperature for a very long time. I usually add in some cooking liquid and whatever herbs strike my fancy. For the lamb, I brined it overnight in a solution of two quarts water, half a cup of sugar, and a cup of salt. In the morning, I patted it dry, seared it in a little bit of olive oil, poured in some vinegar and Jack Daniels, then added some thyme, mustard seeds, peppercorns, and about ten peeled cloves of garlic. I roasted it in a covered Dutch oven for about 7 hours at 200 degrees Farenheit.  The results were amazing, and will be the foundation of our meals this week.

Monday

  • Lamb with wine reduction, green beans, and toast

Tuesday

  • Enchiladas with mushrooms and leftover lamb

Wednesday

  • 24 hour "omelette" (more like a casserole)

Thursday

  • Chorizo, chickpea, and spinach soup (using the broth leftover from cooking the lamb)

Friday

  • Pizza

Saturday

  • Gnocchi with mushrooms, lamb, and cream sauce

Weekly Meal Plan


This week, I'm trying to be a little healthier - cutting back on the sugar, getting a little bit more exercise, getting out in the sun, and getting plenty of sleep. But the dinners this week are all about comfort food. And, since I started a new job (!) that keeps me busy, they have to be pretty quick to assemble too (I already spent a good part of the day yesterday prepping). 

Monday
  • Chili

Tuesday
  • Crabcakes with stuffed mushrooms and green beans

Wednesday
  • Mushroom Pad Thai

Thursday
  • Potato-bacon-corn salad

Friday
  • Frittata

Weekly Meal Plan


Last week’s plan to get everything cooked ahead of time worked really well…except we had to fly back East, so a lot of it went uneaten. The last few days have been all about salvaging leftovers and eating what was supposed to be dinner last week for every meal imaginable.  This week should be a little bit more predictable, but with the result that I haven’t cooked much in advance.

Monday
  •  French Onion Soup
  • Using farmer's market onions, and beef broth left over from the beouf bourgignon last week

Tuesday
  • BBQ (from a braised pork shoulder), coleslaw, and macaroni and cheese

Wednesday
  • Corn pudding
  • Using farmer's market onions, and leftover corn from the freezer

Thursday

Friday
  • Pizza
  • Using farmer's market bell peppers

Weekly Meal Plan

I like it when life runs like a well-oiled machine. No surprises. Easy peasy. Tranquil.  But the reality is, life is just not like that - not for more than a day or two at least.


Weekly Meal Plan


Mike's away today and tomorrow, and we'll be going all over kingdom come at the end of the week, so there's no traditional meal plan this week. If you're wondering, I'll probably be eating farmer's market berries,  local cheese, and local salami for lunch, and cheesy rice for dinner. Since we'll be super busy and away from home later in the week, we'll be doing a lot of "dashboard dining," aka making sandwiches in the car for lunch and finding gluten free restaurants for dinner.

But in the meantime, I'm using my farmer's market apples to make applesauce and apple butter, and whipping up some flaxseed chocolate chip cookies and English muffins to take on the road with me!

Weekly Meal Plan

I really enjoyed cooking out of just one cookbook last week...I'll definitely be doing that again soon! But this week, I just wanted to focus on the ingredients I picked up at the farmer's market. The corn, for example, is so bursting with juice and sweetness that it's just begging to be made into a corn chowder. And spaghetti squash! It's finally time for winter squashes! Hooray!